26 October 2012

Paris in Melbourne - A Spring Project

It's been a long winter in Melbourne, in fact this was the longest and coldest winter since we moved to Australia almost five years ago. But spring is definitely in the air, the days are getting longer and flowers are blooming, spring in Melbourne really is quite beautiful. We went for a walk around our favourite Cherry Lake last weekend, it's a 3-mile circle and only five minutes' walk from home...
The marshland by the lake is blanketed by the little pink flowers, the beige you see in the distance are reeds from last year but there are new ones coming through. There are abundant wildlife in and around the lake, we saw many tiny little birds with bright blue chest bouncing around the walk path but they were too quick for me to capture on camera.

The changes in the air make me wanting to start a spring project, so I did! ... the WIPs and UFOs can wait, I need something to set the mood ;)

Project: Paris in Melbourne
Pattern: Paris Tunic by Doris Chan
Yarn:  Panda Regal 4ply mercerised cotton, fingering weight
Cast on:  24 October 2012
Hook: 4mm / G
The beige and grey in the yarn remind me of the marshland, pity there's no pink, I'm not usually a pink person but a little soft pink wouldn't go amiss here. I'm not too sure about the variegated yarn, just hope the colour arrangement won't turn out too tedious. Also I'm keeping my fingers crossed that there's enough yarn, my sleeves won't be as long and I will be making a smaller bell shape at the cuffs so that might help.

Thanks for dropping by, there is more fibre arts fun at Wisdom Begins in Wonder. Indulge your creative side and join the party!

19 October 2012

I'm a lucky winner, and some FOs :)

I received an email during the week from the wonderful Denise of Voie de Vie that I was one of the lucky winners to receive her new eBook: Accessories: Autumn 2012. This was such a lovely surprise I was over the moon! All the designs in this collection are gorgeous but I'm particularly taken with the Piaf Scarf and the Enveloped Cowl. I can't think of any yarn in my stash that I want to use for these projects (naturally!), but hey, I can spin now! So I'm going to spin some yarn, maybe home dye too, off to the drawing board to make plans... will report back later :)

On the knitting front I managed to finish couple of projects, a sideways jacket for my aunt and a hat for my goddaughter.

Sideways Jacket:

Hat for Ericka using my rainbow dyed yarn :)

That's it from me this week! Thanks for dropping by, there is more fibre arts fun at Wisdom Begins in Wonder. Indulge your creative side and join the party!

12 October 2012

I've Got Wheel!!

At the beginning of the week I was feeling a little sad, because my spinning class was coming to an end and I was going to hand back my borrowed wheel. Then everything changed quite suddenly... I have been on the look out for a secondhand wheel without much luck, on Tuesday afternoon I searched again on eBay and found a listing for a vintage Ashford traditional that looked in reasonable condition. So I clicked on it to read the description, to my surprise and delight, the seller only lived 30 minutes away from me, and she welcomed anyone who wanted to go for a test drive! I immediately contacted her and cajoled her to let me have a go the same evening, she agreed. The rest, as they say, it's history... someone was looking after me that day ;)
Introducing Charlotte- my first wheel, isn't she beautiful! Charlotte came with a lazy kate and seven bobbins, she's in very good condition and spins smoothly. When I brought her to my last class my teacher told me that the style of her maidens suggests that she's circa 1965-1970, she and I could be sisters :)

Charlotte also came with the original assembly instructions and some leaflets:
I haven't had the chance to read these yet, but they look rather interesting don't you think?

My knitting has suffered a great deal in the last month or so due to my new found love, but I'm still chipping away (slowly) at some WIPs. I did complete a new project though, mainly because I needed it for show and tell, it's my first homespun item:
It's a simple crochet scarf, the pattern is free and can be found on Ravelry. I only had about 140 meters / 150 yards of the yarn so I just kept going until I almost run out, then did a simple shell border on each end. It came out rather cute I think :)

I really must catch up on more knitting next week, if Charlotte will let me ;)

Thanks for dropping by, there is more fibre arts fun at Wisdom Begins in Wonder. Indulge your creative side and join the party!

05 October 2012

Rainbow Dyeing with Kool-Aid: Instructions

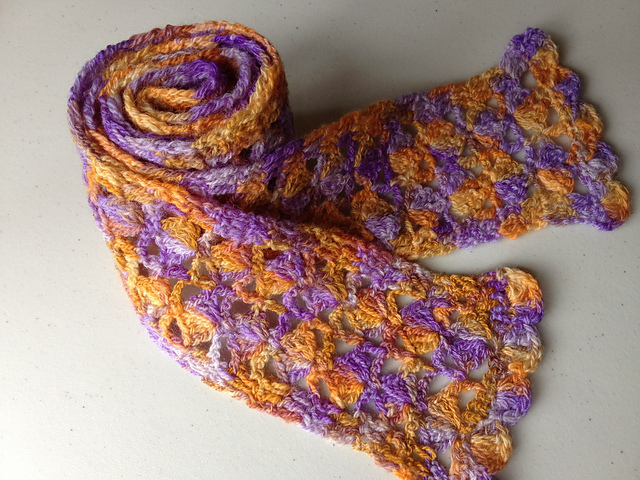
When I showed my rainbow dyed yarn last week some of you showed interest in learning how it's done, as there is no spinning class this week I thought I'd write that Rainbow Dyeing post with instructions :)
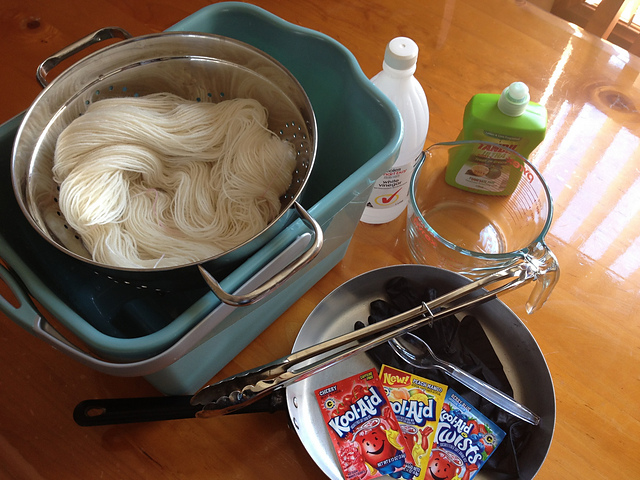
What you will need: 

  • undyed yarn/top/fibre/scoured fleece
  • three different coloured powder dyes. I'm using Kool-Aid today because that's all I have at home. But you can use any acid based dyes or food colourings.
  • a frying pan or shallow cooking pot, or electric frying pan.
  • a pair of tongs (if you don't want dyeing your fingers too, or burn them!)
  • a pair of rubber gloves
  • a plastic spoon (mine gives a perfect measure of 5g/0.18oz of powder)
  • white vinegar 
  • dish washing liquid
  • a colander for draining
  • a bucket for soaking and rinsing
  • a water jug for adding water if needed
N.B.  You should always keep dyeing equipments separate, I bought this old pan and tongs from an op-shop (shrift store). I should find another colander too, but as I'm using Kool-Aid I'll be let off today ;)


Step-by-Step Instructions:

1. Weigh your dry material. The ratio for powdered dye and undyed material is 1:10.  For example I'm using 100g of yarn, so I need 10g of dye all together. The 3 packets of Kool-Aid is roughly 10g.

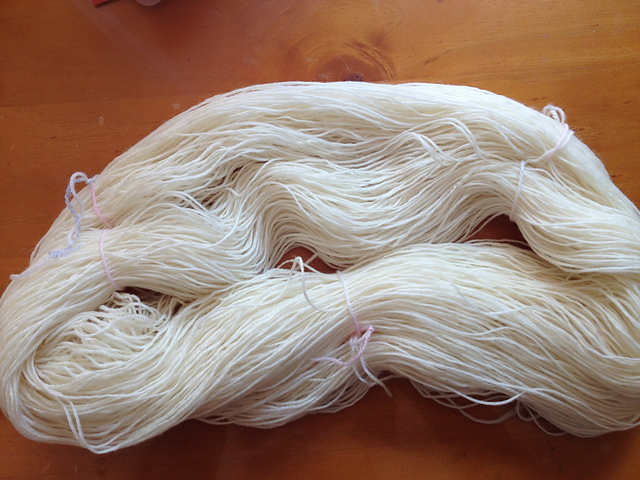
2. Tie your yarn in several places to prevent tangling during the process. If you're using fibre top or scoured fleece you don't need to tie them. (N.B. make sure you don't tie too tightly if you don't want rings of undyed spots where the ties had been)

 3. Soak your yarn/fibre/fleece for at least 1 hour, better result if soaked overnight. (N.B. if using commercial yarn you might need to soak with some dish washing liquid to help dye absorption).

4. Drain the yarn/fibre/fleece to get rid of excess water. Your undyed material should be thoroughly wet but not dripping.

5. Add some water to the pan, not too much because you don't want to submerge the material. Then add a dash of dish washing liquid and a dash of vinegar.  - can you see the dish washing liquid in the pan? No need to mix or stir.
 6. Add the material to the pan and arrange it so that there is no empty space at all. There should be enough water for cooking (so that it doesn't run dry) but not covering the material - this is very important as too much liquid will allow the dyes to travel in the pan and merge together to make the colour murky. (if you have less material try using a smaller pan to fill the gap with other fibre things like a clean old tea towel that you don't mind ruining)
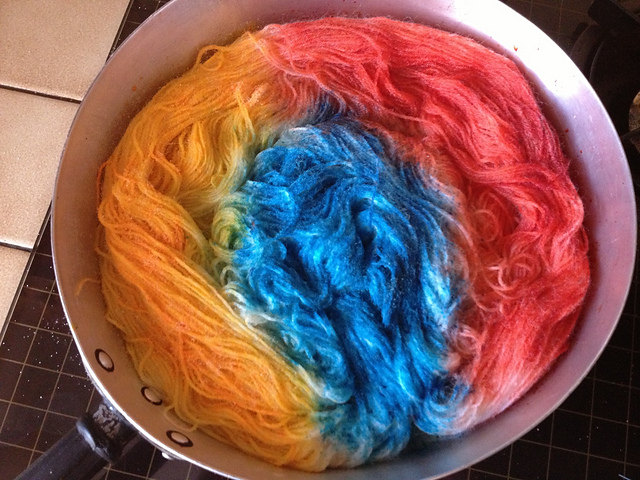
 7. Now the fun part!! Sprinkle the dye powder over the material in three sections, the colours next to each other will merge and make new colours.
8. Start heating and bring it to a simmer - do not boil! Once the pan starts to simmer set the timer for 10 minutes (if you are using commercial dye), I actually waited 15 minutes as I was using Kool-Aid. Do not be tempted to stir or fiddle with it, but you can poke it with tongs if you think the powder is not dissolving - make sure you wipe the tongs clean or rinse them before touching another colour.

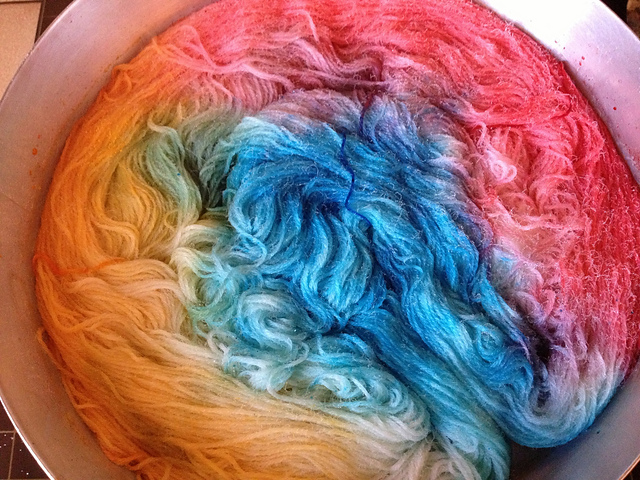
9. After 10 (or 15) minutes turn off the heat and let it cool for 10 minutes. The picture below is after cooking.
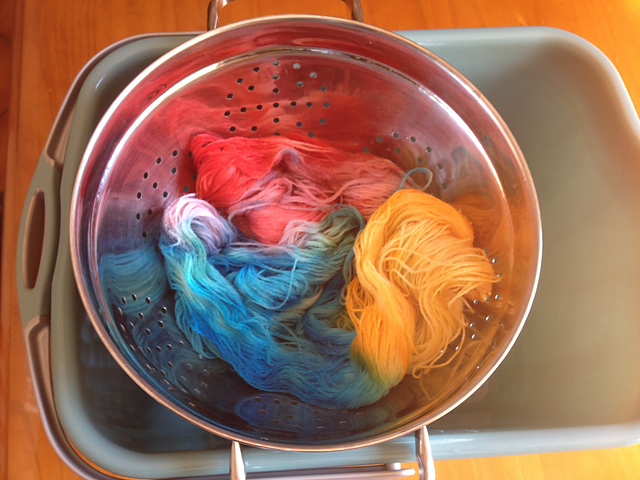
10. Using your tongs to take out the yarn/fibre (it could still be hot) and let it drain in the colander.
11. Once drained and completely cool, rinse in cold water until the water runs clear, squeeze out the water (do not wring) or roll in a clean towel, then hang in the shade to dry.
And there you are, beautiful rainbow dyed yarn! or fibre :)

Of course you can use any colour combination, last week one of my classmates only used 2 colours (purple and pine green) and the result was stunning. You can also do this in a microwave or an oven, but I haven't tried those methods yet.  Knitting-And.com has a post on rainbow dyeing using pre-mixed dye in which you mix the dyes into liquid and pour over the undyed yarn, the result is the same. On reflection I think you can use just one colour and you might get different shades of the same colour or have an semi-solide effect. In fact next time I might do just that :)

Now it's your turn to have fun with Rainbow Dyeing, please do show us what you have created :)

Thanks for dropping by, there is more fibre arts fun at Wisdom Begins in Wonder. Indulge your creative side and join the party!

P.S. Last week someone asked how I got the dark denim blue colour from Kool-Aid, well that's a mix of grape and blueberry, interesting result isn't it  :)